Wednesday, November 14, 2007

new free pattern back scrubber

http://www.freewebs.com/artknitter/


Materials
worsted weight cotton yarn such as sugar and cream
Bulky or hobbie machine
tension on 8
Cast on  11 stitches
 knit 10 rows transfer the middle stitch to the right or left and make sure needles are in working position.
knit 10 rows
repeat 6 more times ( 80 rows)
   Now change to another color and repeat the whole thing until you have 80 rows. cast off.
 Now fold in half.
 You have holes every 10 rows up the middle.
Take one side and thread it through the hole at the top.
 For instance if  you have red and black thread the red through the black then thread the black thru the red.
 Keep repeating until you get to the end.
I cord for looped handle on each end:
With the end of your braid with the wrong side facing you hang 4 stitches on the machine
knit 96 rows
hang   the last 4 stitches of the I cord to  the first row of 4 stitches where you began your I cord
knit one row cast off
hide all your loose ends tie a slip knot very close to the braid

This  technique can be used  to make a great dog leash. It also makes a great bag handle very firm and sturdy just leave off the I cords on one end for the leash and make it longer for the lenght you need for your dog. Make smaller loops on each end for a bag

shrink art buttons washed and dried


These got washed and dryed with a pair of jeans and they are none the worse for it.
I am considering them a sucess

Tuesday, November 13, 2007

big button shrink art

http://www.freewebs.com/artknitter/

36 years ago I was art major ,I took copper enameling. You had to beat on copper throw it acid no oil could be on it.A coat of glue solution followed by a tiny sifter screen with glass powder. Then it went into the kiln

Embossing powder, shrink plastic and a heat gun. looks darn good! I messed up the button hole with the wire. Hey I am messy
Posted by Picasa

button from #6 salad container


I read this this morning about using plastic salad/take out food containers . This person makes shrink art from #6 plastic containers. You can find the number on the bottom in the recycle triangle?
Here's my button I made I cut a circle. It shrinks. A 1"and 3/4 inch circle shrunk down to a half inch button. I used a paper punch to punch the hole in before I shrunk it.
I sanded my piece (you have to) used a cotton swab and I put embossing powder on it. The plastic shrunk before the embossing powder got shiny. I had to use my heat gun on it. I held the plastic through one of the holes I punched with one of my stem wires, or it blows away.
You can use colored pencils, sharpies, anything thats permanent. If you use non-permanent it washes off.
To had to experiment for size. You can stamp on texture right after its shrunk before it hardens again.
I don't know how it will be for washing. Maybe you can tell me!


Saturday, November 10, 2007

www.knitting my life away.com

for my patterns and freebies http://www.freewebs.com/artknitter/

Today I thought I was going to accomplish probably what would take days. I did start 2 new projects, I made a doll it was too loose you could see the stuffing. I made a pincushion it was too tall and too loose too.
Worsted yarn is all different weights It can be the same brand and be thicker. I had brown knit up tight, I used a pink and beige it was loose. I had to really tighten up the tension.
I guess I'll have to set up the mid guage again.

Friday, November 09, 2007

Early 90's Mop dolls


http://www.freewebs.com/artknitter/


Remember mop dolls? I made a lot of them back then.I can't find a picture right now I made cheerleaders in school colors. They had big hair. I'll have to look they were cute and easy to make.

Thursday, November 08, 2007

sideways knitted vest


It needs a lining ribbing on the bottom and button bands Then it will be done. I used a lot of different novelty yarns. I knit this on my 7mm knitting machine

Wednesday, November 07, 2007

Holidays approaching,Mine is Christmas it is coming!


Yesterday I designed a wreath I am pretty excited about it. I can't finish it today.
I have to work on a job that pays first the couch I am reupolstering.
I am having fun designing fun knitting projects. I don't get much feed back I look at the traffic and I am amazed how many people looked.


I have added some free patterns

for my patterns and freebies http://www.freewebs.com/artknitter

Monday, November 05, 2007

My zen foliage


These were done on a midgauge


Begining, middle, and end
Purple for cleansing and healing
white for hope

These will last have no odor and my cats won't chew them. I remember to relax when I look at them I try!
ok update Cats will chew them and yank every one out of the arangement and ruin them.

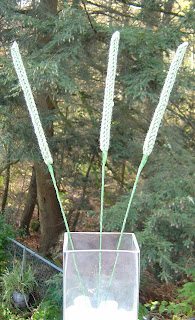
Zen grass


I neede some peace in my life so I knitted these an uneven number green for truth

Wednesday, October 31, 2007

I knitted a Christmas tree


I knitted a Christmas tree , the tree outside has no worries. This tree has a beautiful red top It continues to change.


cat tails and plumes


Nature is beautiful. The bog is filled with cat tails milk weed all sorts of grasses. There are beautiful berries. Its the big finish the seeds. Its all so pretty now.

Dandylion


I was walking through the bog and there are so many plants I decided to knit a copy. I could enjoy it and have no mess. My cats eat dried arangements. I have so many balls of fun fur and so many ideas

Sunday, October 07, 2007

cut and sew machine knit sweater


Here it is and I have worn it a few times its Red Heart Fiesta yarn done on The Singer 155 bulky knitting machine.
I used knit interfacing I bought at the fabric store. It comes in white and black.
Don't be afraid make something small or use yarn from the thrift store to practice. Just knit up some yardage get out a pattern iron on your knit interfacing and YES cut it out.
Having a serger makes it that much more fun clean all the edges but I sewed the seams together on the regular machine.
The interfacing gives it a firmness around the sleeves and neck I like.
If you wanted to you could iron on interfacing to the whole piece. Then you'd have a less clingy sweater.
I have another one I made on the standard and I really like it. I was a sewer first. I love serging!
I cut a one inch wide piece of iron on interfacing for the length I measured the width of the back and front.
I measured up one inch from the hem edge. I ironed the knit interfaicng on.
I and turned my hem up steamed it and sewed it in place.
I intend to have a draw string on the bottom with 2 button holes for the string to come out of.

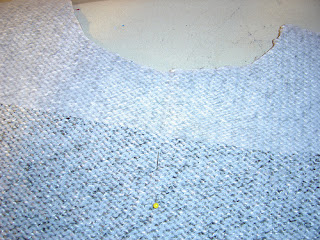
here is the knitted piece I have ironed on the knitted interfacing. The blue is waste yarn

Now I pin the sleeve pattern on and cut I do the same for all 4 pieces

Here is the front after I have ironed on interfacing and have cut arounf the pattern piece

Here's the back

I have serged around my cut area

Here is my sleeve before I cut it. I have made a hem I am going to have a cuffed sleeve

here I have serged the cut edge of my sleeve This is the front side. The cuff will be turned over after its sewn.

her is the front and back serged at the shoulders I have serged the sleeve in. I have cut away the interfacing on the sleeve for better drape

You can see the seam is pretty flat and stable

Saturday, April 14, 2007

Machine knitted fancy fur by Lion brand and vinyl


well I couldn't resist this was done the same as the purse below except I didn't square off the bottom this time.ts lined with 2 pockets inside. I bought the handles at Joanne's fabrics

Monday, April 09, 2007

Using vinyl on the knitting machine


How to use faux leather on the knitting machine

Please don't copy and paste use the link.
Give me credit for this design.
Thanks.
Karen Lothrop

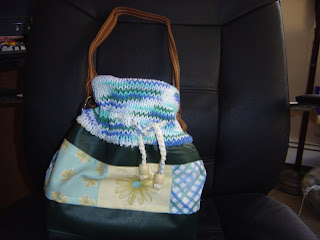
It is getting to be that time spring! I wanted a new bag. The prices were high my interest in buying low. Here is what I did. I bought some vinyl and I had yarn.
I wanted a nautical feel. I used cotton for the fabric and yarn. I bought the handles. The draw string is 3 strands 5 X’s what ever length you want. I wove it in and out of the 3rd row from the bottom.

I cut a piece 20 inches by 14 inches. I put the edge up to my needles and marked with a gel pen.

I used a hole punch and punch holes

I added fabric strips I punched holes across both ends which will be the tops.

Hang from the holes you punched wrong side facing you

e wrap the first row and knit manually loosely.

knit 46 rows you want to end with carriage on left.

You pick up every other stitch from your first row and hang it on the machine knit 1 row. You just hung your hem.

Here’s what the hung edge looks like. Now do a crochet cast off. Do the other end the exact same.

Here is what your piece will look like.

Fold your piece in half. Go to your sewing machine and stitch the side up to the knitting. Use a tapestry needles and stitch up your knitted top by hand I used the mattress stitch.

From the side seam I measured 2 inches. Draw a line and sew across. This makes the bottom square


I made the lining the same way and added pocket. There are lots of books and sewing patterns if you need more info on that.